Creating a Linux Blog Using WordPress, Apache and PHP
A blog is a way for readers of your website to leave comments without using email. They can discuss your article, adding intelligent and thoughtful content to your web pages [1]. This page shows how to create a simple blog using WordPress, a popular open-source web publishing package. It assumes you want to compile Apache with PHP support yourself. The procedure for installing WordPress also works for PHP comment scripts.
In Windows and OSX, the easiest solution is to install Apache, MySQL, PHP, and Perl simultaneously using XAMPP.
[1] Sarcastic remark to be added here.
Are comments on web pages really desirable?
Web pages that contain opinions on political, religious, or otherwise controversial topics usually elicit comments that are more hateful than insightful. Commenters who might be tactful and circumspect in email are much less so when they think they are anonymous (even though they really aren't). Web pages that are humorous also generate lots of hateful comments from humor-impaired readers. Even pages that are purely informational often generate hateful comments. In general, religious people and Tea Party types tend to be pretty tolerant, and rarely send nasty comments. Other groups are not so polite, and will attack anyone they disagree with. Think carefully before you open a page for comments. If you allow comments, you also need to set up a firewall or some other barrier to keep out the crazies.
The problem of people anonymously leaving nasty comments is one reason to use a PHP comment script instead of basing your website on Wordpress. With a script, you can enable or disable comments by changing a single line in your HTML page.
Wordpress vs. a Simple Website PHP Comment Script
A Website comment system, like IntenseDebate, Disqus, or Easy PHP Guestbook, is a simpler way of handling user comments. However, if the script doesn't interact with your SQL database, chances are what you've actually signed up for is to have your comments hosted on someone else's site, in which case all your content could disappear without warning at any time. Even it the script is legitimate, many of the simpler ones lack essential features like proofreading, spam protection, and the ability to delete comments. The latter is especially important, because sooner or later, somebody will submit a comment filled with obscenities and hateful expressions. If you don't know SQL, you'll run the risk of corrupting your database if you start deleting things by hand.
WordPress is the only one I've seen whose homepage, and a couple of their other pages, contain valid, syntactically-correct XHTML. Unfortunately, WordPress is pushy--it forces you to do things its way, so it is not suitable as a simple add-on comment system. From what I can tell, in order to use WordPress you have to re-build your entire website from scratch. A better solution for people who have "static" web pages is a PHP comment script.
A typical free PHP comment script is
Scriptsmill . To add a comments section for Scriptsmill, you would add
the following line at the bottom of each xhtml file for which you want
comments:
<!--#include virtual="/comments/comments.php" -->
The script generates HTML code that is automatically inserted
in your webpage. In order for this to work,
Server Side Includes must be activated in your server. The script
uses MySQL to keep track of which comments belong on which page.
With these PHP scripts, you still have to create and configure a MySQL database as described here. Installing the scripts, whether you're using WordPress or a simple script, is the easy part. Unfortunately, while they may be lighter, most of these scripts are full of XHTML errors that will prevent your web page from validating. What this means is that if you're using a strict doctype, your page will be blanked out when viewed in IE6. That means you have to learn PHP and modify the scripts before you can safely use them.
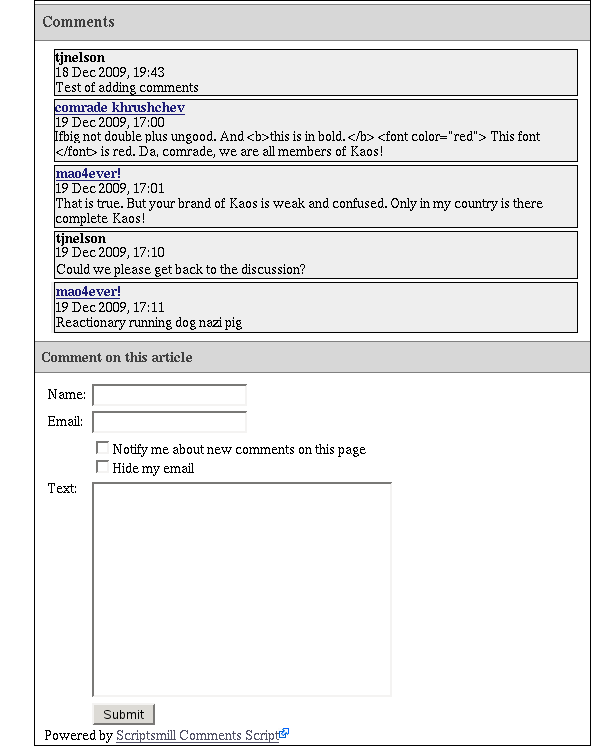
Here is an example of what Scriptsmill would look like if I added it to this page:

This particular script, as modified below, does not change your css settings, which is a very nice feature. It's fairly basic--users can't even add HTML tags--but it works, and it's useful as a learning tool.
Before you go off changing things on your website, I strongly recommend installing an HTML validator on your browser. That's especially true if you're going to modify someone's PHP script. Otherwise, you'll have endless problems getting your pages to render properly.
Step 1. Install the software and get Apache to work with PHP.
- Install MySQL, libmysqlclient, libmysqlclient-devel, phpMyAdmin, PHP, mcrypt, and libmcrypt-devel. If possible, you should install these from your Linux installation disk. Otherwise, you may be in for a long night.
-
Install a version of Apache web server with PHP and MySQL support. If you
compile your own version, Apache and PHP need to be compiled together,
because they are interdependent. Be sure to include the
 --with-mysql,
  --enable-mbstring
, and--with-mcryptoptions. If you installed it without mysql and mcrypt support, you will have to re-compile it. See linuxsetup42.html for details and an explanation of the compilation options.
After installing php, it is necessary to stop and re-start Apache, otherwise you will get a blank page.
Here are the configuration command lines I used on one system (yes, the Apache on this system is fairly old).
For PHP:./configure --with-apxs2=/usr/local/apache2/bin/apxs\ --with-apache2=/home/tjnelson/apache/httpd-2.0.50\ --enable-shared --with-mcrypt --enable-mbstring\ --with-mysql=/usr/bin/mysql
For Apache:./configure --enable-module=so\ --with-apxs2=/usr/local/apache2/bin/apxs --enable-ssl\ --enable-mysql --enable-includes --sysconfdir=/etc/httpd
- Create /etc/php.ini if you don't have one, as described in Step 3 of linuxsetup42.html .
- Edit your httpd.conf file to allow php. See the last part of Step 4, part 4 in linuxsetup42.html for details.
-
Start up Apache and MySQL to test the installation:
cd /etc/init.d
su
./apache2 start
./mysql start
If you're running Suse and it says
./mysql: line 233: ./mysql: No such file or directory
ignore it--it is a bug in Suse's startup script. Add the linecd /etc/rc.dbefore line 233 in /etc/init.d/mysql to get rid of the message. -
To make sure PHP is working, create a web page containing
the line
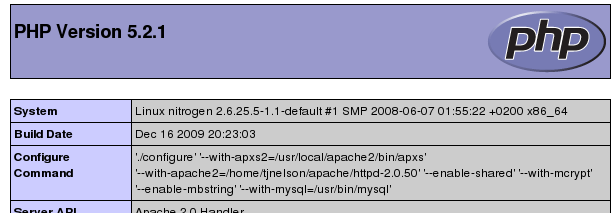
<? phpinfo(); ?>. Navigate to this page from your home page, not from a file. It will most likely not work if you load it asfile:///home/abcd/test.php. It should print a purple information screen like this:

Step 2. Configure MySQL.
-
Most people start MySQL at boot-up in /etc/init.d.
When you first start up mysql, it prints a bunch of instructions,
which can be ignored. Type
/usr/bin/mysql_secure_installation
and set the root password, remove anonymous users, and disallow remote root access. -
Verify that there are a mysql group and user.
  cat /etc/group | grep mysql

     cat /etc/passwd | grep mysql
If not, create them:
su; groupadd mysql; useradd --gid mysql mysql - We will use phpMyAdmin for creating a database and a non-root MySQL user. If you're familiar with SQL, you can enter the appropriate commands manually.
Step 3. Download, install, and configure phpMyAdmin.
PhpMyAdmin is a web-based tool for configuring MySQL, adding users, and creating databases. It may be on the Linux installation disks. This example shows how to configure it manually. The configuration process consists of editing a short text file.
There are two ways to do it. The first way is to open setup/ in a browser. Before doing that, create a config directory and a soft link as shown. The link is needed because php will not work unless you access the page through Apache.
su
cd phpMyAdmin
mkdir config
chmod o+rw config
cd /usr/local/httpd/htdocs   (or wherever your top HTML page is located)
ln -s /home/tjnelson/sql/phpMyAdmin-3.1.3-rc1-all-languages/setup setup
The second way is the manual method, which is actually a little easier, and is preferred because you will have to edit the file again anyway.
- Un-tar phpMyAdmin-3.1.3-rc1-all-languages in your home directory somewhere.
-
Copy
config.sample.inc.phptoconfig.inc.phpand edit it. - On line 17, where it says "blowfish_secret", add an unencrypted password in single quotes up to 46 characters long, such as: 'coughcoughachoogesundheit'.
-
Get rid of the advanced stuff in the file for now. The config.inc.php
file will look like this:
<?php
$cfg['blowfish_secret'] = 'coughcoughachoogesundheit';
$i=0;
$i++;
$cfg['Servers'][$i]['auth_type']     = 'cookie';
$cfg['Servers'][$i]['host'] = 'localhost';
$cfg['Servers'][$i]['connect_type'] = 'tcp';
$cfg['Servers'][$i]['compress'] = false;
$cfg['Servers'][$i]['extension'] = 'mysql';
?>
-
Make a soft link from your top HTML directory to the phpmyadmin directory.
Options FollowSymLinksmust be enabled in your httpd.conf for this to work.su cd /usr/local/httpd/htdocs (or wherever your top HTML page is located) ln -s /home/tjnelson/sql/phpMyAdmin-3.1.3-rc1-all-languages/ phpmyadmin
-
Start up mysql and apache if they're not running:
su
cd /etc/init.d
./mysql start
./apache2 start
-
In a browser, connect to your local Apache: http://localhost/phpmyadmin.
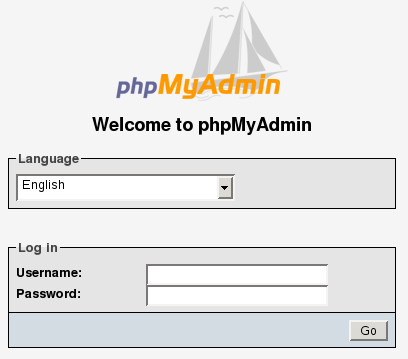
You should get a login screen with no errors on it:

- Log in using "root" and the system's root password.
Error messages
"Cannot load mcrypt extension. Please check your PHP configuration."
Install the mcrypt package and recompile php and apache with --with-mcrypt.
"Cannot find MySQL header files"
Install libmysqlclient-devel .
Red error bar at the top saying
"phpMyAdmin - Error Cannot load mysql extension. Please check your PHP
configuration. - Documentation"
Install the mysql, libmysqlclient, and libmysqlclient-devel packages
and recompile php and apache with --with-mysql .
"The mbstring PHP extension was not found and you seem to be using
a multibyte charset. Without the mbstring extension phpMyAdmin is unable
to split strings correctly and it may result in unexpected results."
Re-compile php with --enable-mbstring. See
here.
"phpMyAdmin was unable to read your configuration file!
This might happen if PHP finds a parse error in it or PHP cannot
find the file."
The most common cause for this is accidentally following the instructions
and specifying ssl or mysqli in your config.inc.php file as it says to do.
Blank page in Apache after making above changes
Re-start Apache. There is no need to re-start Apache after
changing config.inc.php.
Step 4. Use phpmyadmin to create a MySQL database
This information is from http://codex.wordpress.org/Installing_WordPress
- Log in to phpmyadmin as described above. Under "Create new database" enter some name (for example, "blog"). Leave "Collation" alone and click Create. It should say "Database blog has been created."
-
Click the small "home" icon (a white house with red top) and click
Privileges, then Add a new User.
User name:   Use text field:   wordpress
Host:                          Any host
Password:    Use text field:   booger
Re-type:                       booger
Click Go (Don't use this example "booger" as your password. If you can't think of a good password, click "Generate Password"). - It should say "You have added a new user." Leave the Global privileges at their defaults.
- Click Go.
- Click Home, then Privileges. This should bring you to the User overview screen.
- Click the Edit Privileges icon on the right, on the line for the "wordpress" user.
- Under Database-specific privileges, select "Edit privileges for the following database" and select the new database (for example, "blog").
- Click Check All
- Click Go. Make a note of the Server name at the top (usually "localhost").
-
The comments from users are stored in
/var/lib/mysql/blog. -
Using
useraddor some equivalent, create a new user on the system with the same password, with the shell set to/bin/false. - If you're a Linux user, you probably like doing things
the hard way. You can also create a database manually as shown here:
$ mysql -u adminusername -p
Enter password:
Welcome to the MySQL monitor.  Commands end with ; or \g.
Your MySQL connection id is 5340 to server version: 3.23.54

Type 'help;' or '\h' for help. Type '\c' to clear the buffer.

mysql> CREATE DATABASE databasename;
Query OK, 1 row affected (0.00 sec)

mysql> GRANT ALL PRIVILEGES ON databasename.* TO "wordpressusername"@"hostname"
    -> IDENTIFIED BY "password";
Query OK, 0 rows affected (0.00 sec)

mysql> FLUSH PRIVILEGES;
Query OK, 0 rows affected (0.01 sec)

mysql> EXIT
Bye
$
Step 5. Configure WordPress.
- Download and de-tar Wordpress.
-
WordPress consists of a bunch of php files. Copy all of them along
to a directory under your document root. It's best to keep them all
in a separate directory.
cp -R * /usr/local/httpd/htdocs/wp/
-
Rename the
wp-config-sample.phpfile towp-config.phpand edit as desired, specifying your databasename ("blog"), your username, and the password you entered above. - In the section "Authentication Unique Keys", generate the four keys using Wordpress's online key generator and slap them in, in place of the blank ones.
-
Copy your config file to the same place you copied
the wordpress files. This location will vary depending on
whether you're the administrator or a user on the system.
For example:
cp wp-config.php /usr/local/httpd/htdocs/wp/
-
In a browser, run the install script
http://localhost/wp/wp-admin/install.php
Pick a name for the blog, enter your email address, and click Install. - If it says, "Success!", write down the username and password it provides.
-
With a browser, navigate to
http://localhost/wp/.
Creating WordPress blogs
If all you need is a regular blog, you're finished. Just edit the default css file or download a theme from http://wordpress.org/extend/themes/ and modify the css as necessary. Changing the blog itself is a bit trickier, because you will need to know php.
If you want to have multiple blogs (such as one for each user), you will need WordPress Mu (Multi User). There are a number of little steps to take care of first: http://trac.mu.wordpress.org/browser/trunk/README.txt
Integrating WordPress into your web pages
You can also add WordPress functionality into a conventional static web page, but it's a round peg for a square hole. Be forewarned that you will also have to do extensive editing of WordPress's code to get your HTML to validate. To be perfectly honest, if all you want is comments, WP is more trouble than it's worth. I recommend using Scriptsmill (described below) instead.
-
Add the following line near the end of your HTML file:
<!--#include virtual="a.php" -->
-
Create the a.php file and copy it to your document root.
<?php
include('wp/wp-blog-header.php');
echo '<h4> Comments on ';
the_title();
echo '</h4>';

query_posts('p=1');  // p=post ID
include('wp/wp-content/themes/default/page.php');
get_footer();
?>
You can edit the theme page to get rid of all the junk it puts on the screen. But there's still a major problem: all the comments for all pages are bunched together indiscriminately. From what I can tell, the only way to identify which comments go to which article is by its "post_ID". I have no idea how to get comments into a specific HTML page in WP without abandoning the static page concept. Their documentation is not forthcoming on this question.
-
Add WP functions
to get more fine-grained control. These functions are all available in your
php script once you include the
wp-blog-header.phpfile. Do not use the functionget_header(). This will mess up your css formatting.
Integrating Scriptsmill Comments into your web pages
This script is much easier to use, but it also lacks features like previewing and archiving. It also seems to be much faster--WordPress sites seem to be very slow to load.
First, get your page to validate so you can find the XHTML errors in
the script.
Then add one of the following lines near the bottom of your web page
(I use the third one):
 <?php require("/path/to/your/www-home/comments/comments.php"); ?>

 <?php virtual("/comments/comments.php"); ?>


 <!--#include virtual="/comments/comments.php" -->
To activate spam filtering, edit config.php and set
$COM_CONF['ckeck_for_spam'] = 1; (be sure to spell 'check'
with two 'k's as is done here). Then obtain an Akismet API key from
http://akismet.com/personal/
and insert it into the appropriate line of the config file.
Edit config.php and set the database, username, and password
to that created with phpmyadmin. Don't use root, because the password is
stored in the clear in a file in your htdocs directory (although remote
users can't read it).
The script automatically mails you when a comment comes in. To delete
a comment, log in at http://localhost/comments/admin.php
using admin and the password you specified.
It's probably a good idea to warn posters that HTML tags will be automatically
stripped from their posts. Alternatively, you could edit the comments.php file
and remove the lines in function smcom_add that convert
< and > to < and
>. If you do this, be sure to change your Doctype to
Transitional or you will get comments that invalidate your page!
To change the appearance, edit the file
/usr/local/httpd/htdocs/comments/templates/default.php.
This script as installed had 42 XHTML errors in it. To get it to validate,
it's necessary to remove all the style and div
sections, and to fix up the XHTML. Also, if your web page already has a
"note" or "text" class, it will conflict with the script, possibly messing
up its appearance. Rename the class names in default.php and define their
appearance in your .css file.
Here is the result.
Et voilà, comments.
Scriptsmill Problems
Email notifications not being sent to administrator:
If your Web server is running as user nobody, the script
will generate this error when it tries to send mail:
 NOQUEUE: SYSERR(nobody): can not chdir(/var/spool/clientmqueue/):
Permission denied
Solution: chmod a+x /var/spool/clientmqueue
Comments
18 Dec 2009, 19:43
28 May 2010, 06:42
It is not easy when you are not techie.
Thanks for all your information in this page.
I don't know if I can use it because as I am say I am not so technical as I wanted...
Bernard
<a href="http://www.Mesbacklinks.fr">Obtenir des liens gratuitement </a>
18 Jun 2010, 09:29
Comment on this article
Comments on this page have been closed.
